Are you wondering about how to set up lead scoring from multiple touchpoints specifically Google Forms when it comes to collecting leads outside of Zoho CRM? Here is the complete guide about registering the touchpoints outside of Zoho CRM to increase contribution and ultimately leads score.
Who is this Feature for?
- Sales and marketing team
- Small and medium businesses
- E-commerce companies
- Service-based organizations
- Any business with multiple interaction points
- Business with Zoho CRM integration needs
What progress you will achieve?
With the integration of lead scoring from multiple touchpoints, the following progress can be achieved;
- The sales and marketing team prioritize leads based on the level of engagement and readiness to make a purchase
- It is easy to segment the leads into different categories based on their scores and behaviors
- Multiple touchpoints like Google form give an edge to enhance the lead nurturing at the right time with the right content and in this way the chance of conversion increases
- The collaboration of the sales and marketing team increases with the lead-scoring rule and they can focus on high-scoring
- Automation through Zoho Flow ensures that lead scoring is applied consistently across all touchpoints and interactions
Introduction
Setting up touch points outside Zoho CRM is the process of increasing your leads and getting higher scores with the automation of the process.
How to Connect Apps for Lead Scoring?
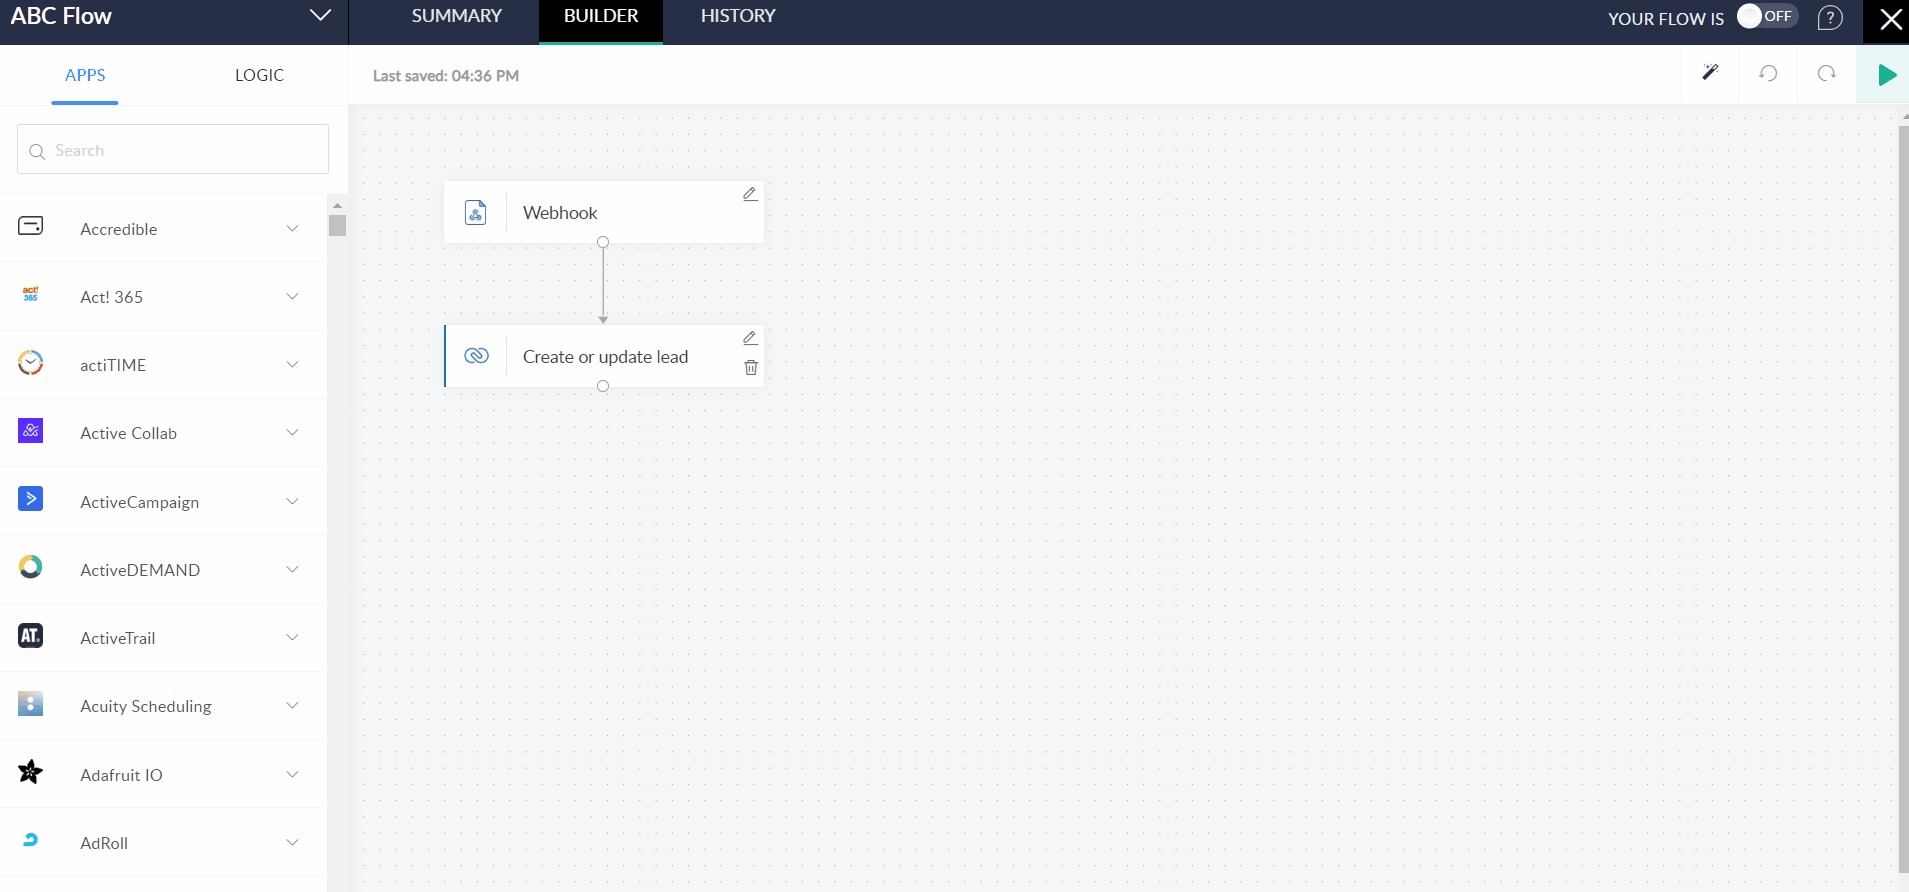
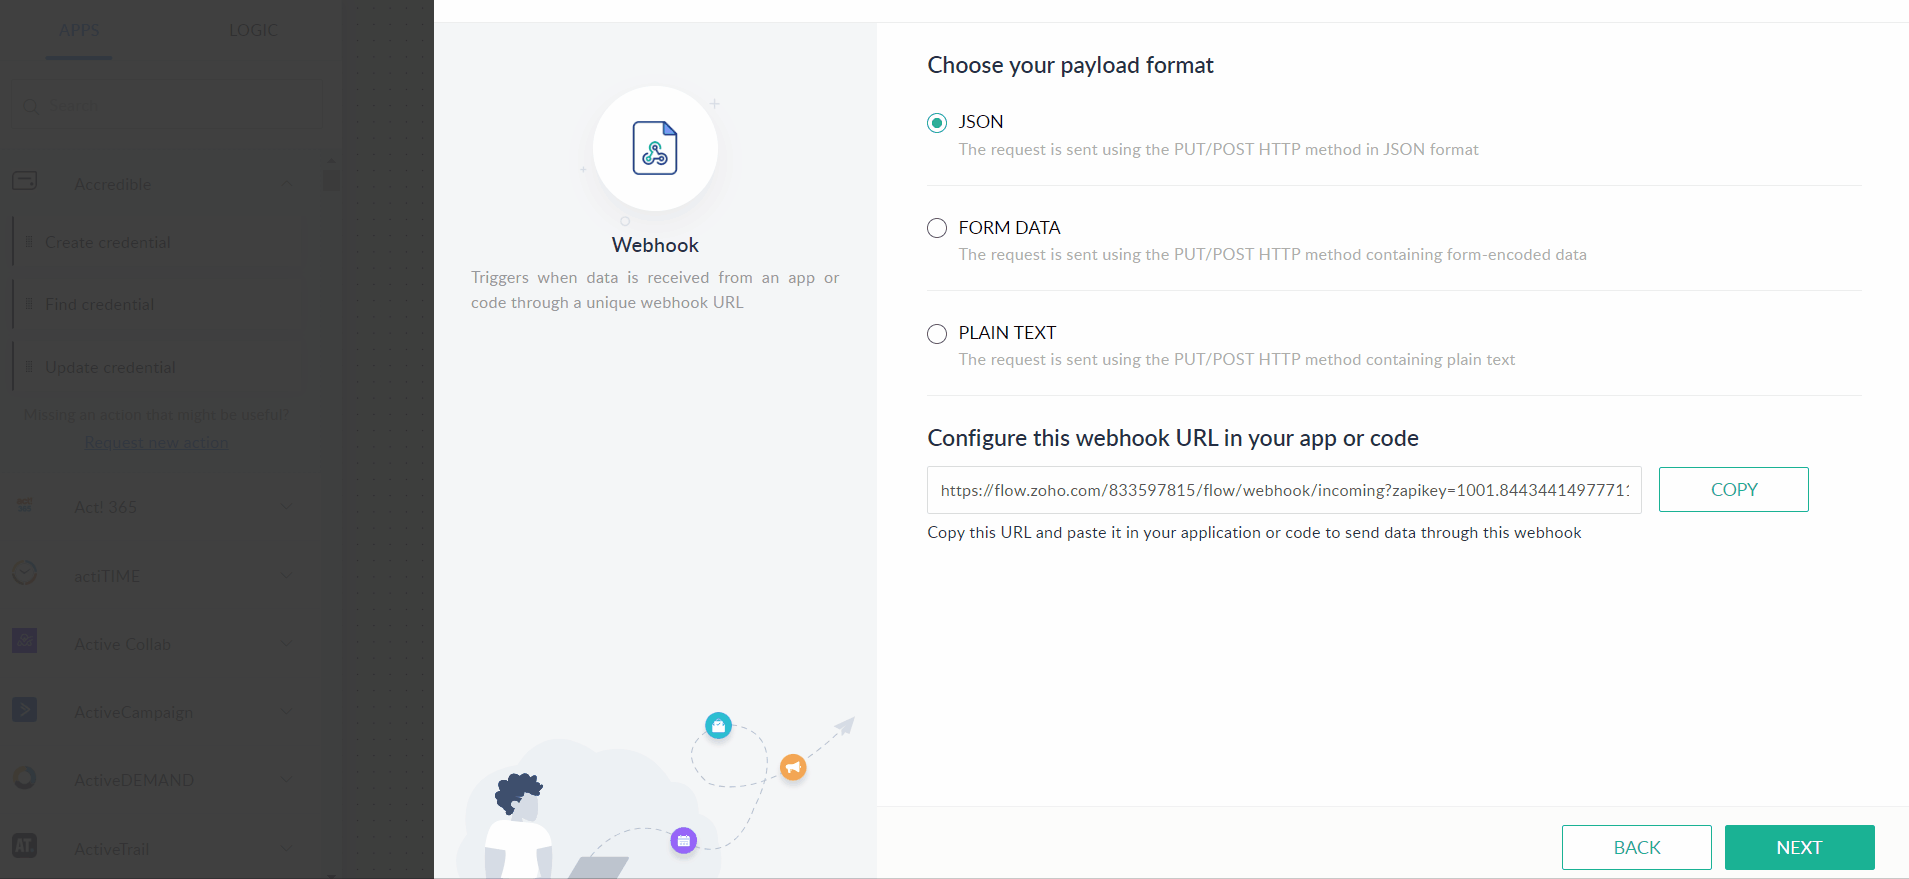
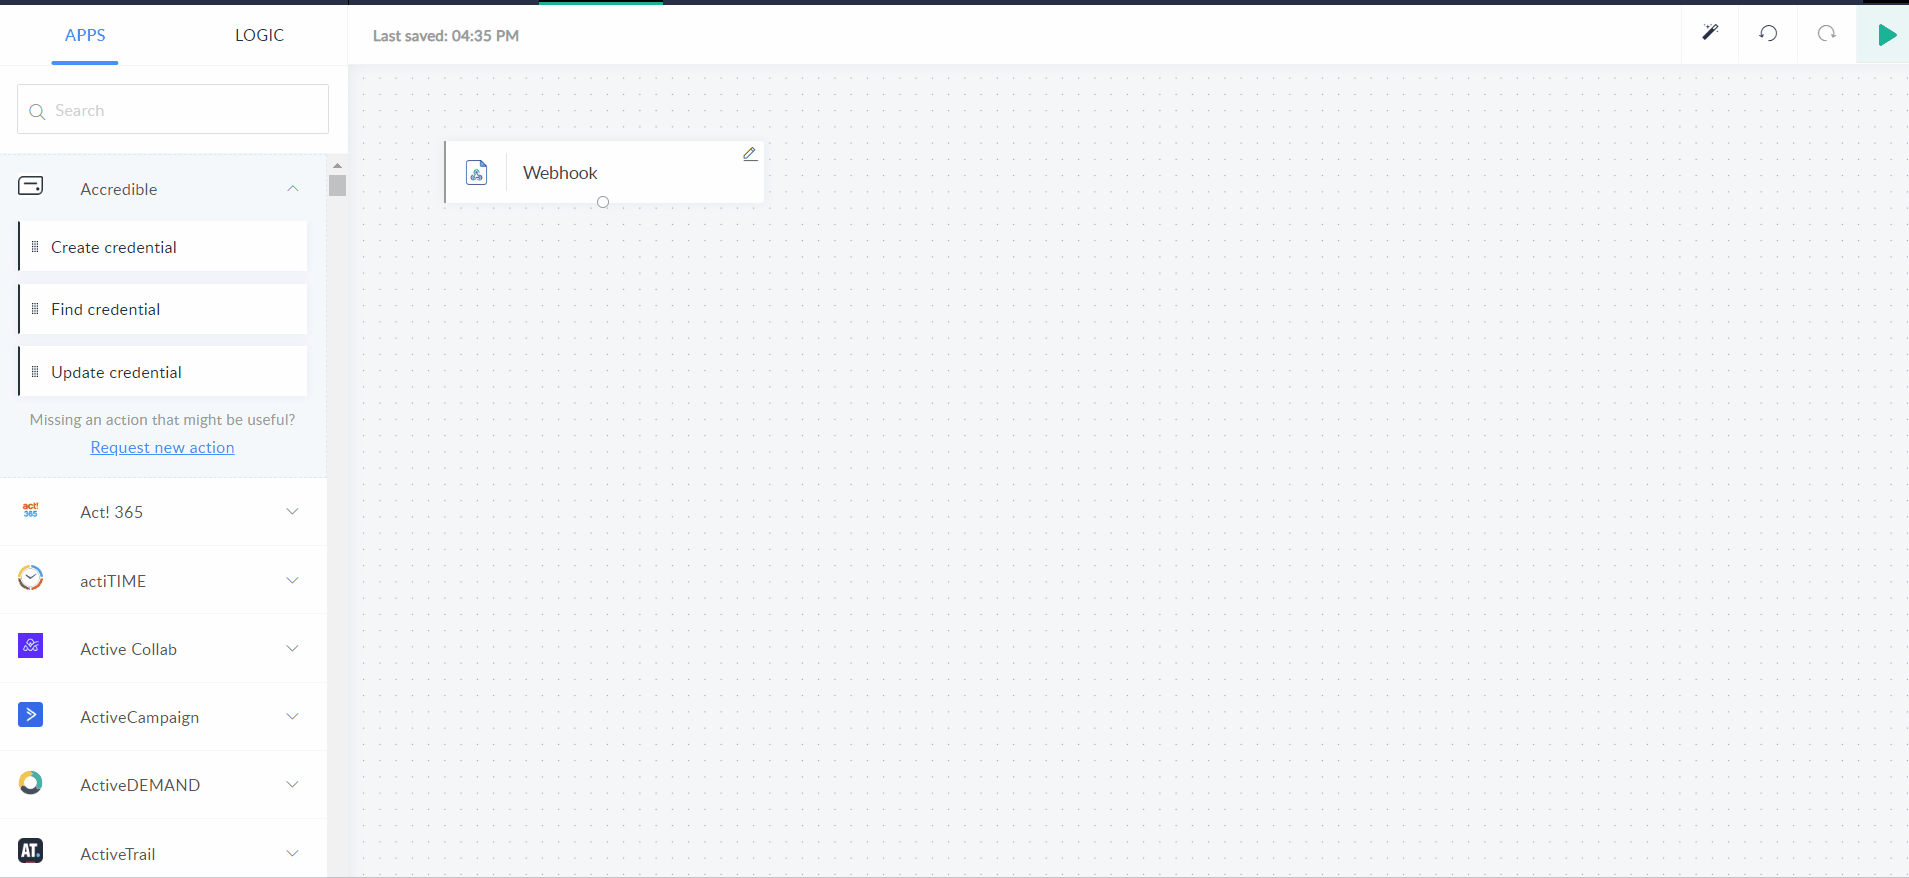
Sign into your Zoho Flow account and create a new flow. Name that flow as per your requirement. Choose a folder as per your requirement and type a description if you want to add one. Then press the Create button. After creation, it will redirect you to the triggers option screen. Choose the Webhook trigger and press the configure button. Then the URL will appear on your screen copy that to paste on the Google form script.
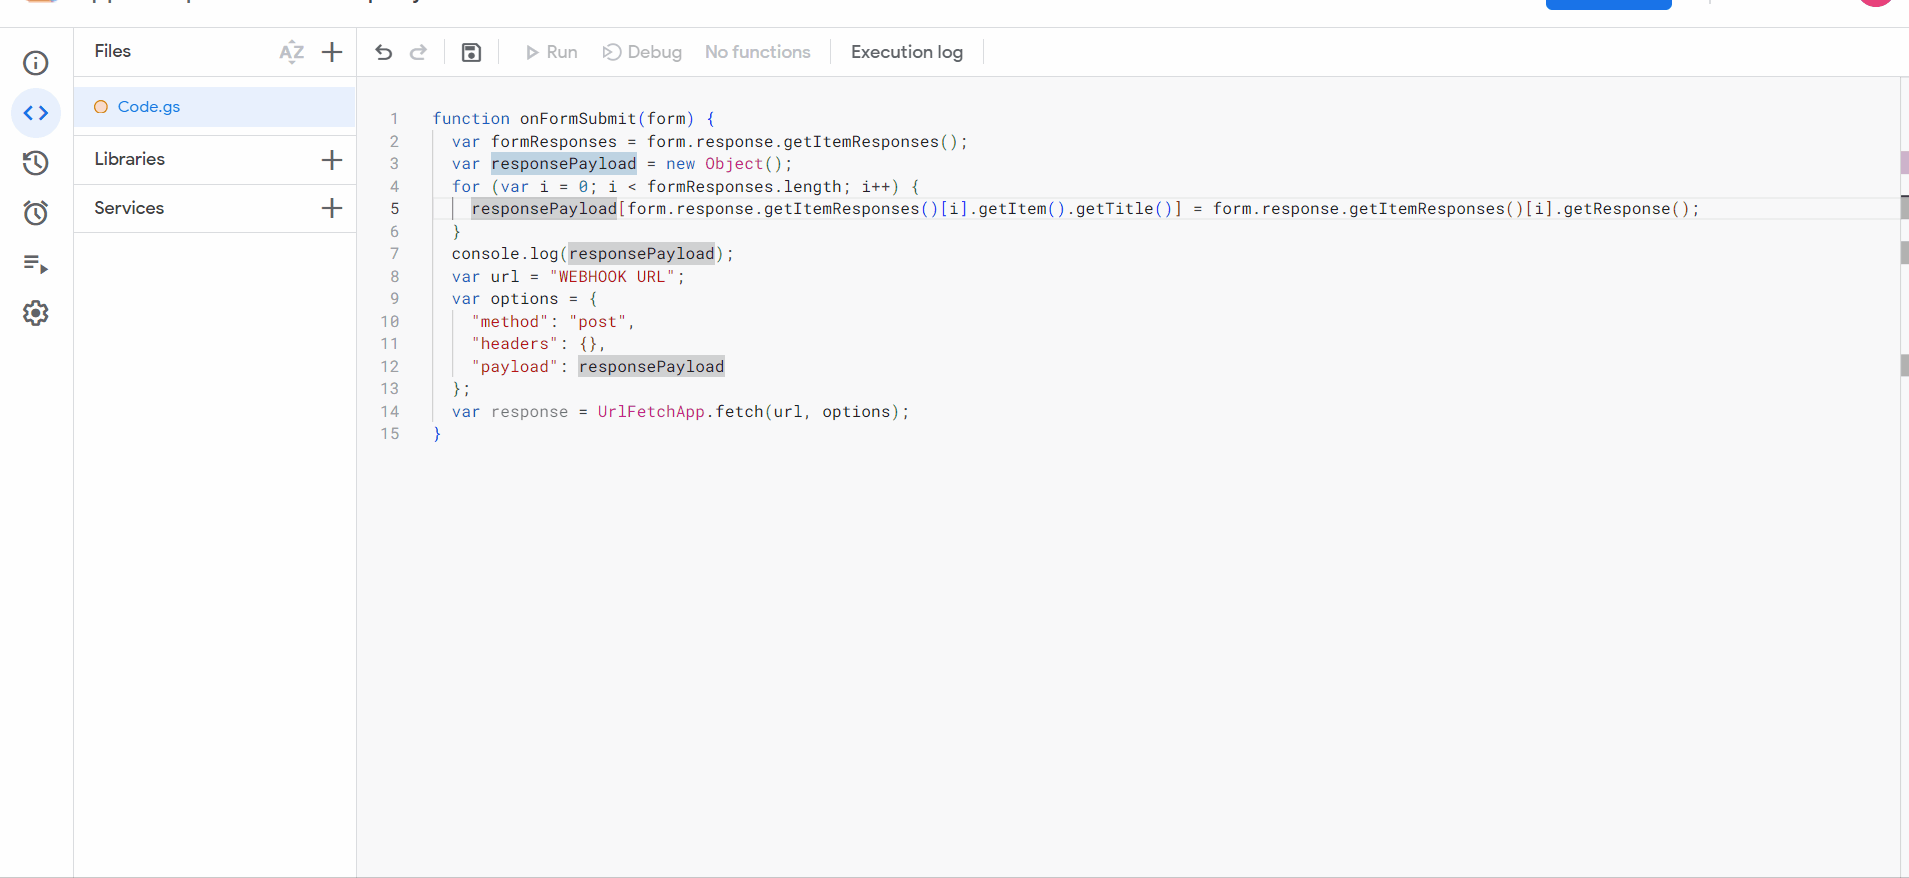
Open the Google Form of your leads that you want to integrate into Zoho Flow. Click on the three dots at the top right of the Google form and click on the Script editor from the drop-down menu. It will redirect you to the code interface script editor.
Remove all the present content and add the code script as follows;
Code Script:
function onFormSubmit(form) {

var formResponses = form.response.getItemResponses();

var responsePayload = new Object();

for (var i = 0; i < formResponses.length; i++) {

responsePayload[form.response.getItemResponses()[i].getItem().getTitle()] = form.response.getItemResponses()[i].getResponse();

}

console.log(responsePayload);

var url = "WEBHOOK URL";

var options = {

"method": "post",

"headers": {},

"payload": responsePayload

};

var response = UrlFetchApp.fetch(url, options);

}
At the place of the Webhook URL, paste the copied link of Webhook from the Zoho Flow. Save the code from the button appearing at the code script interface.
Go to the Trigger option from the menu appearing on the left side. Press Add trigger button appearing at the bottom right side of the screen. Select the onFormSubmit button in the event type and select failure notification settings.
When you save the above settings, you will be redirected to the consent page. Select advanced at this level. Then after the expansion of this interface, select Go to untitled project and then choose Allow on the next screen when appears. The webhook trigger is created.
Now come to the Zoho Flow screen and from the left side menu, type Zoho CRM in the search bar of the App category. Click on Zoho CRM. Drag and drop the Create or Update lead option. If it is already connected to the Zoho CRM then verify the criteria you want or if you want to make the new connection you can create it from the + button. Name the connection and click on the Authorize button. It will redirect to the Access Authorization page. Select Accept. Choose the Use this connection to execute as per your requirement. Also, select system variables from the right side of the Zoho CRM interface at Zoho Flow. Press Done.
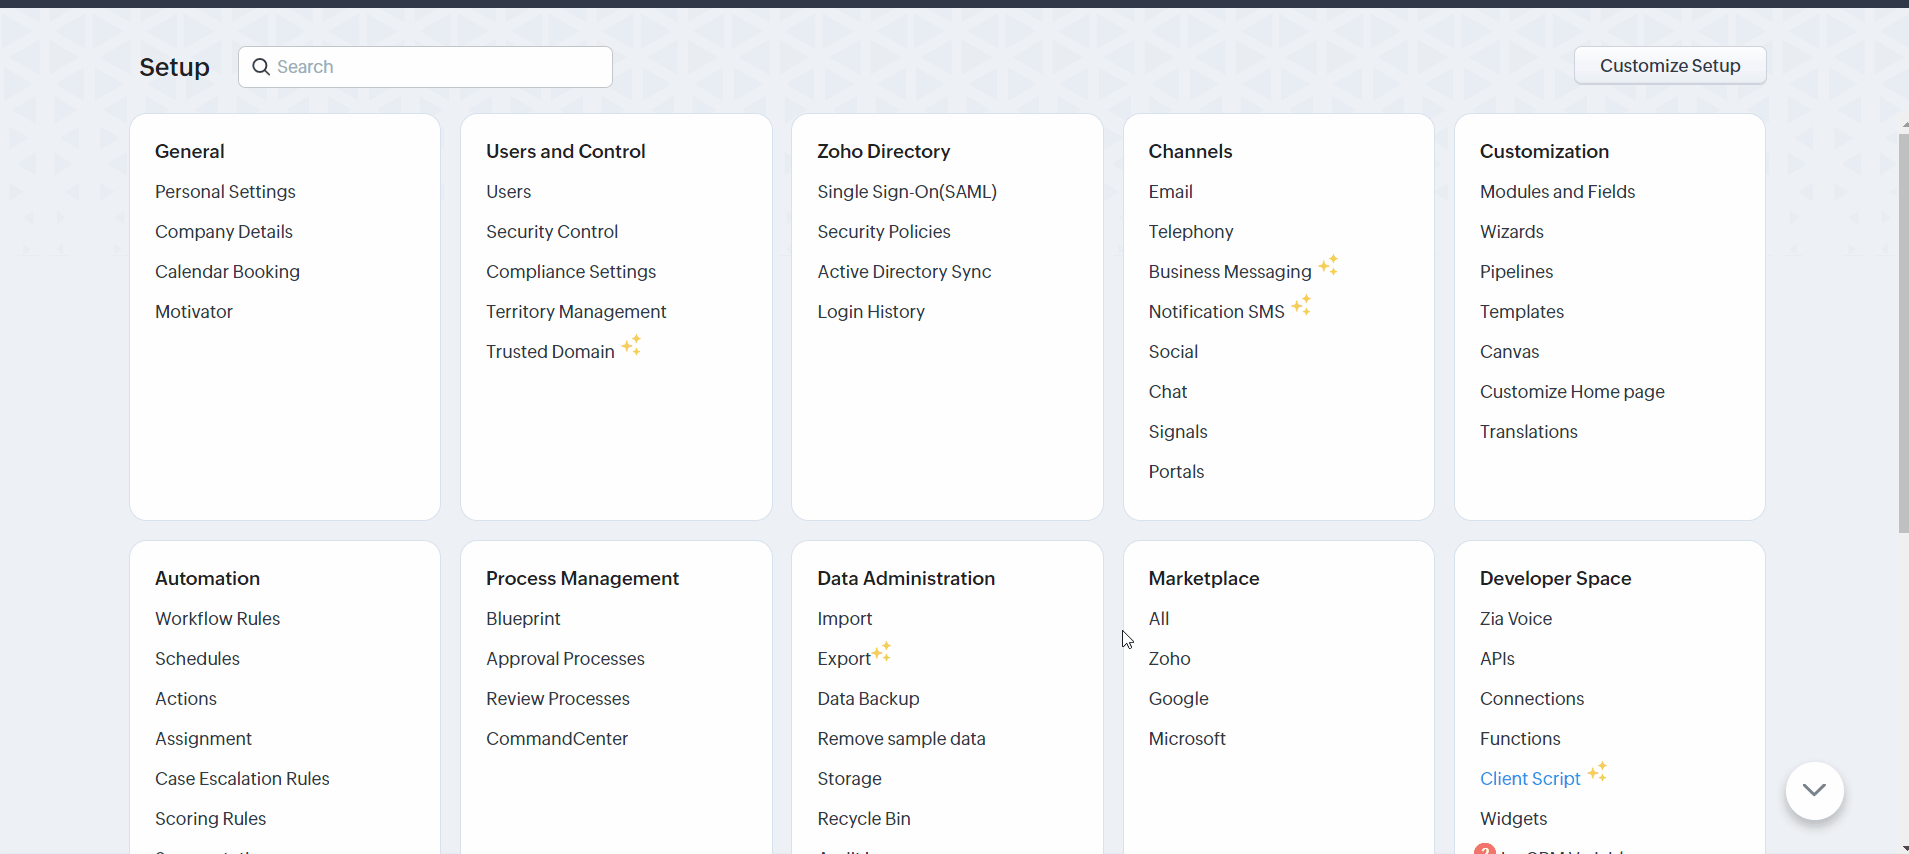
Now set up the scoring rule at Zoho CRM. Click on the Setup icon at the top right of the Zoho CRM interface. Click the scoring rule under the Automation category. It will redirect you to the Scoring rules interface. Press on the New scoring rule button. Name the module, select leads in the module, select Standard in layout, and add a description. Press the next button. It will show you email insights with 3 possible options of checkboxes. Select your required checkbox. Also, add criteria in the Leads field if you want to add them.
After setting all the fields, click on the save button. It will show a pop-up window to ask permission to update old records or continue without the old ones. You can choose whatever suits you.
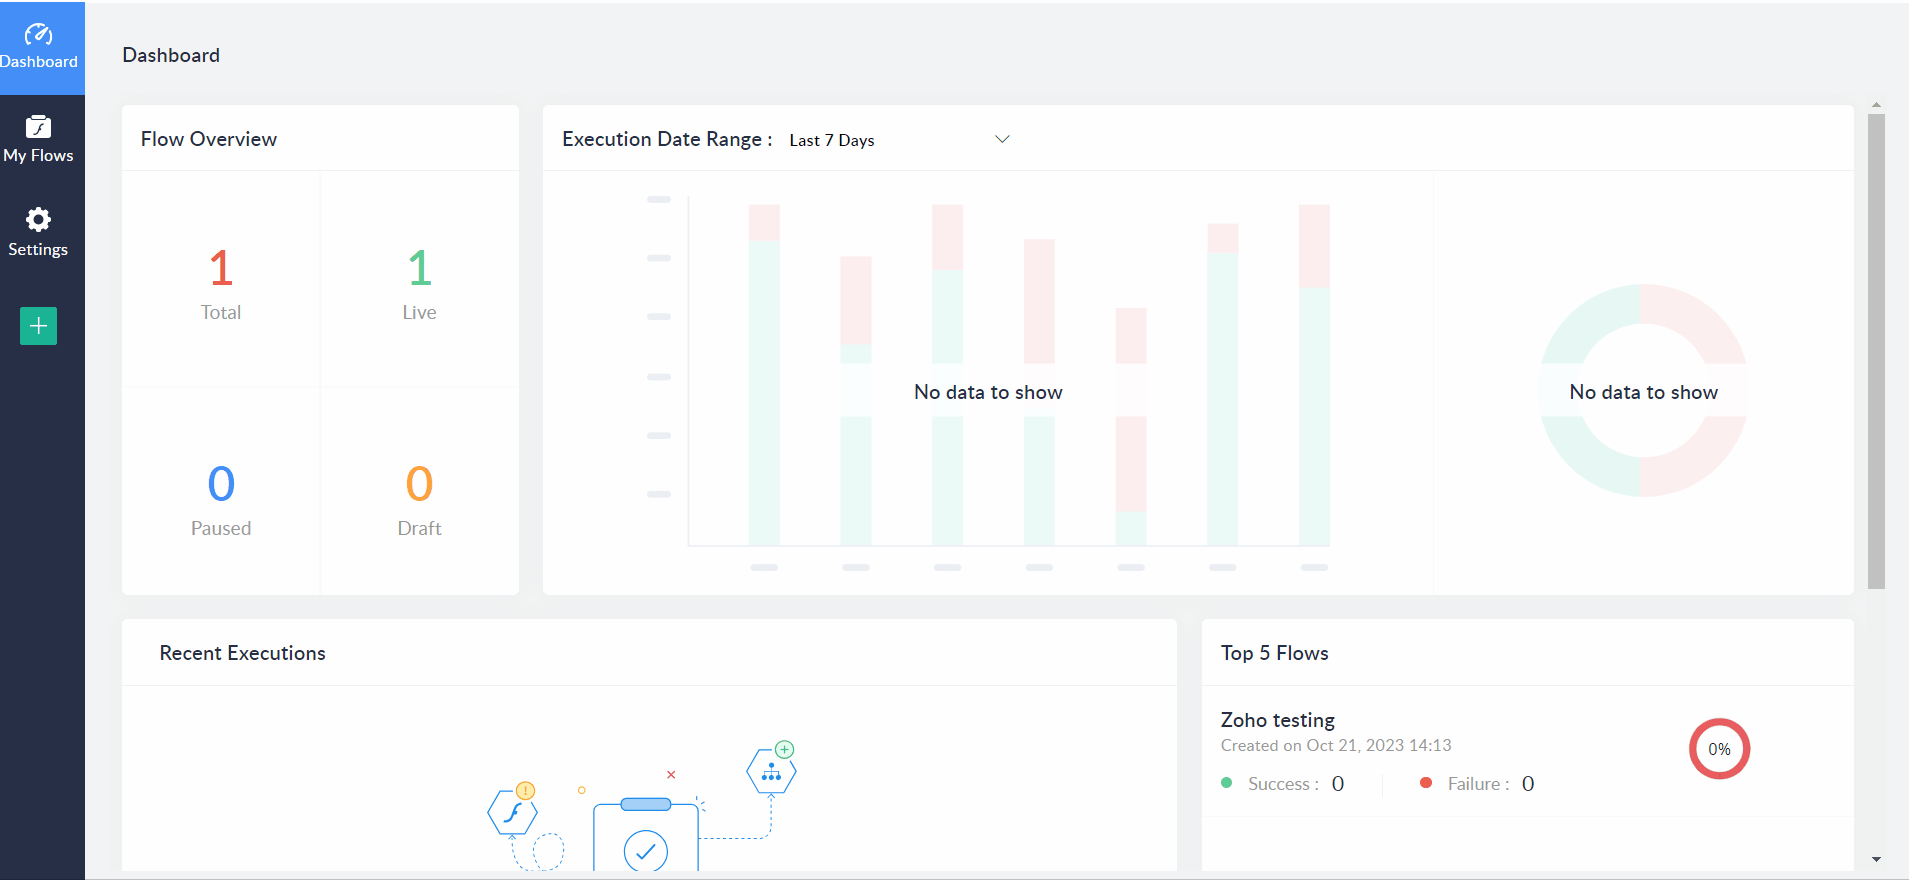
Now come to the Zoho Flow screen, click on the Zoho Flow that you integrated for scoring, and switch on the flow by using the toggle button at the top right corner of the screen. Then go to the Summary screen and click on the Test button under Connections to test the flow. If it is working fine then it will show you Your connection is fine.