How to use Query Component using Zoho Wizard?
Are you looking to add a powerful feature to your Zoho wizard working? Now you can fetch, retrieve, and display data from the multiple forms or tables in your application with the help of the query component in Zoho Wizard.
Published on February 27, 2024
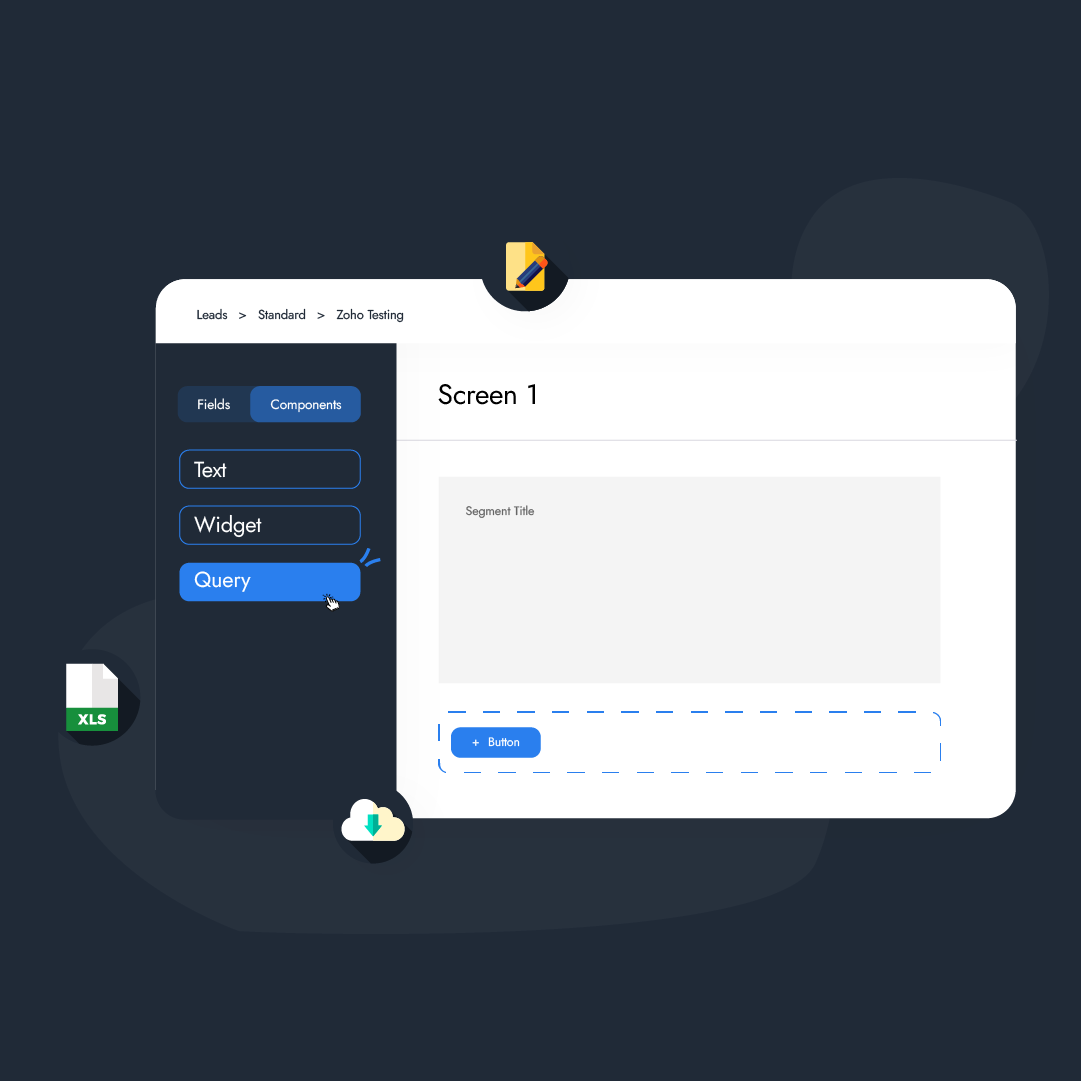
Are you looking to add a powerful feature to your Zoho wizard working? Now you can fetch, retrieve, and display data from the multiple forms or tables in your application with the help of the query component in Zoho Wizard. You will be enabled to make custom queries to fetch, filter, and manipulate the data from all the databases you have already connected. You can retrieve data commonly from web services, external databases, and Zoho creator forms. The query component is basically helpful when you are using the wizard to collect leads.
Who is this Feature for?
- Professionals
- Sales representatives
- CRM Administrator
- Business owners who are looking to expand their business reach
What progress you will achieve?
- By customizing queries and applying filters, you can access the exact information you need, reducing the time spent searching through large datasets.
- With the ability to perform aggregations, joins, and sorting, the Query component empowers you to analyze and manipulate your data effectively.
- By integrating the Query component with external APIs and services, you can automate data retrieval and updates, streamlining your workflows and ensuring data accuracy across different applications.
- The feature of setting parameters allows you to create dynamic applications that respond to user inputs in real time.
Introduction
The query component facilitates users to gather and manage data in an efficient way by providing predetermined actions based on the output of the search query. The component of the query operates as a search field having parameters to set and a preset comparator which is subsequently matched against the field in the current or related module.
Why do we Use the Query Component in Zoho CRM?
The query component has a crucial role in the Zoho CRM wizard that empower users to manipulate data efficiently after accessing. This enables better decision-making and also streamlines the workflows. With a larger volume of customer data that is available in CRM databases, there is an option to extract specific custom data based on the customized criteria as per the need i.e. sales metrics, lead status, etc. In this way, reporting and data analysis can be obtained effortlessly, and also valuable insights are easier to get about customer behavior, sales trends, etc. Furthermore, the Query component supports API integration which enables smooth data exchange with other applications and systems.
How to Add Query Component to Wizard?
First drag and drop the Query component to the wizard interface. It will give you the option to create a query component. Name the query component and click on create button. It will give you Module and Field options. Select Module and select Field. Now it will give you a comparator selection. Choose that and press the save and continue buttons.
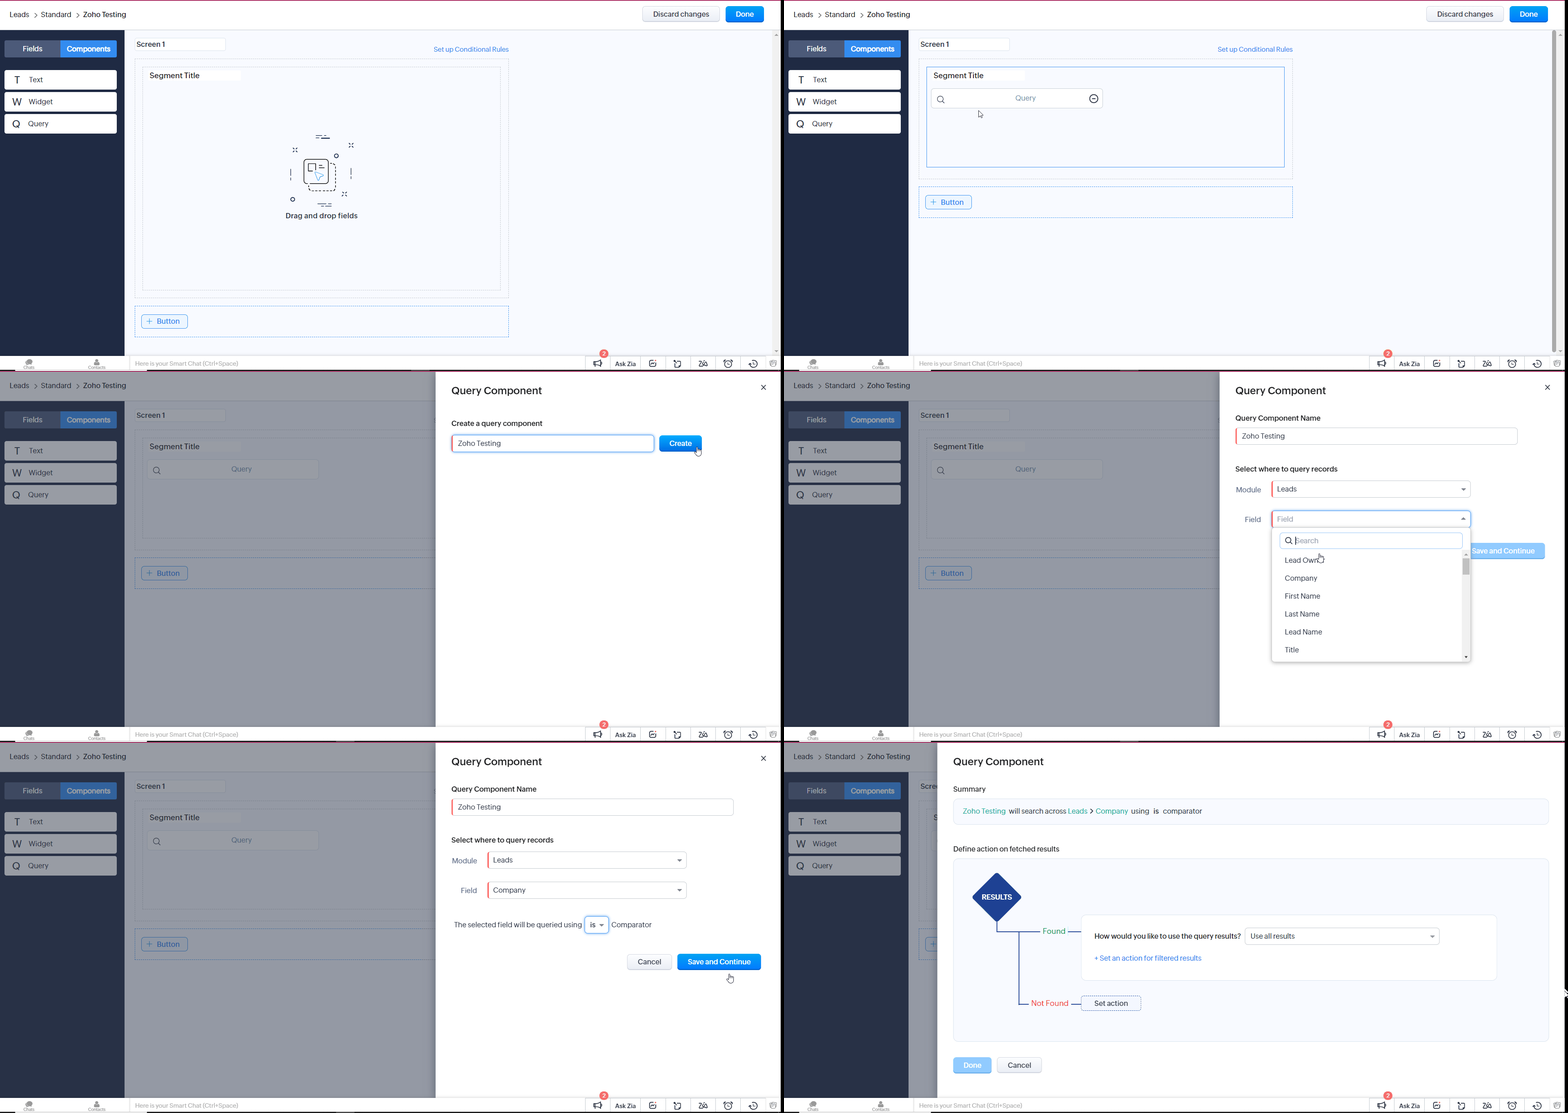
When you save the Query, it will show you the next interface of the Query component to define action and fetch results. In the results option, you can see two options found and not found. In the found option there is a drop-down option available to the How would you like to use your query? You can see use all results and use results that match a specific condition option.
In the not found option, when you click on set action then it will redirect you to the set action for filtered results. Select the action type from the drop-down of the following;
- Create a record in the current module or a related module
- Go to the screen
- Show the widget on the current screen
- Show a message in the pop-up
- Show message in a text component
- Show inline message on a field
In our scenario, the enter message in the pop-up is selected, and now enter a message that you want to display upon selection.
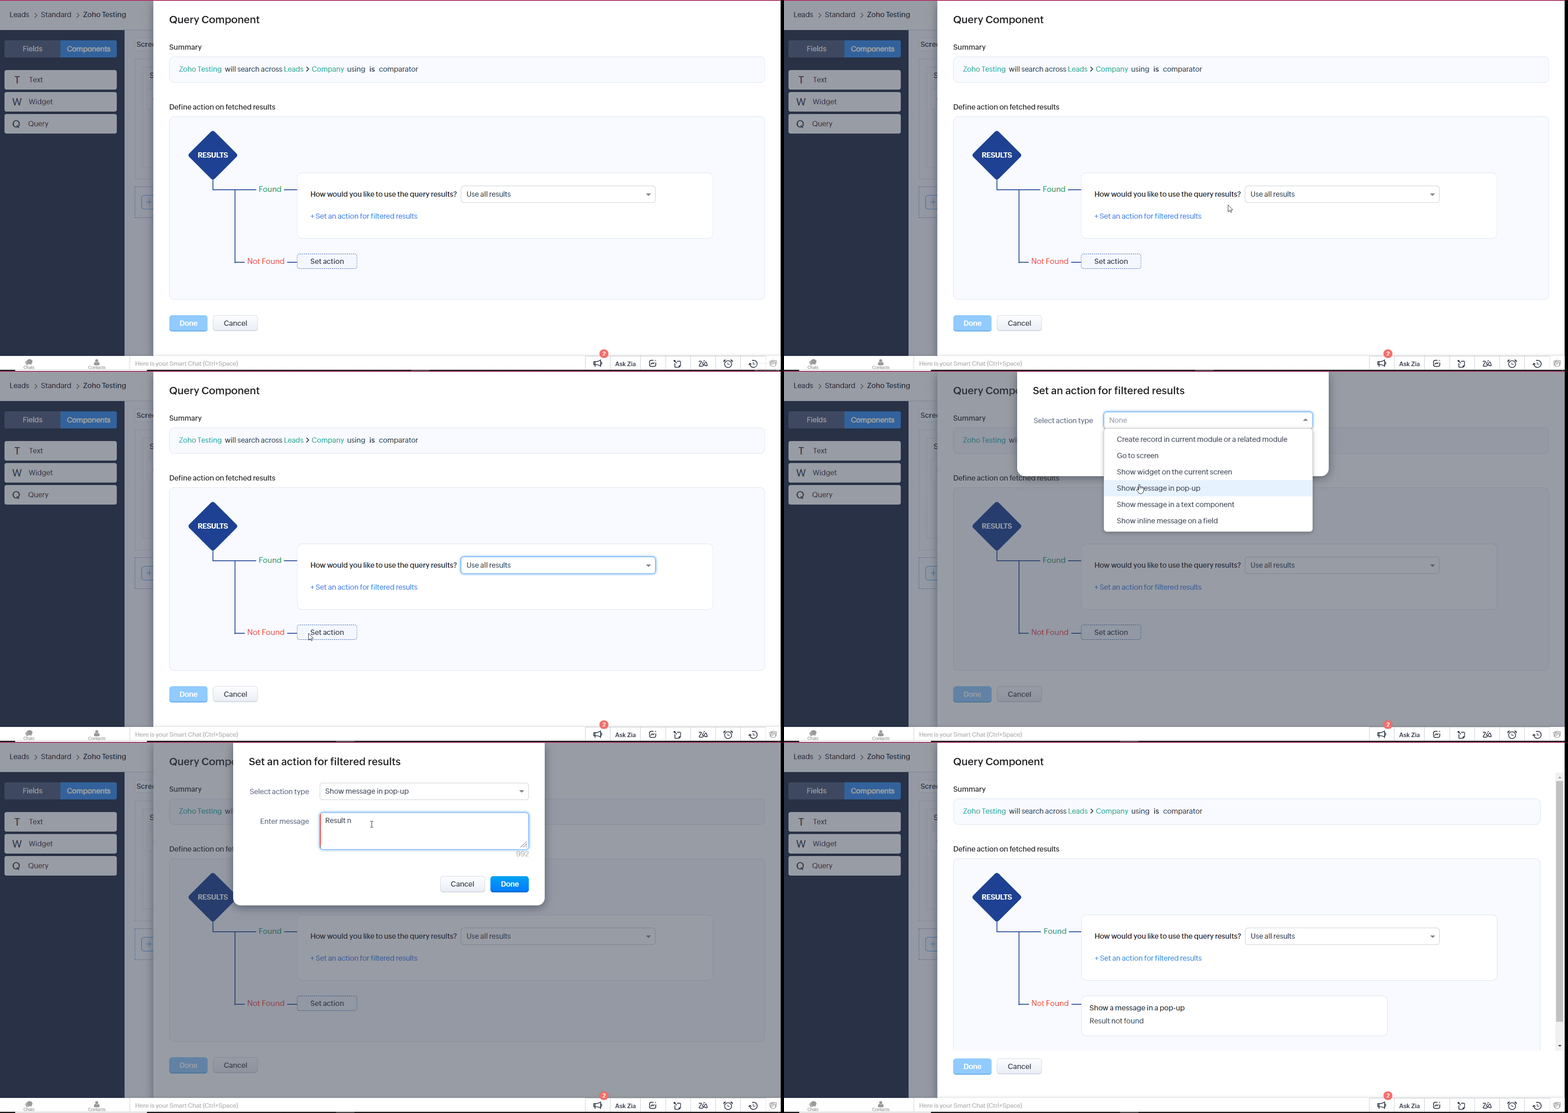
If you choose to use results that match a specific condition option then it will give you the option as follows;
- Annual Revenue
- City
- Company
- Country
- Created Time
- Fax
- First Name
- Industry
- Last Activity Time
- Last Name
- Lead Conversion Time
- Lead Name
- Lead Owner
- Lead Source
- Lead Status
- Mobile
- Modified Time
- No. of Employees
- Phone
- Rating
- Salutation
- Secondary Email
- Skype ID
- State
- Street
- Tag
- Title
- Unsubscribed Mode
- Unsubscribed Time
- Website
- Zip Code
For filtered results, you can set them as per your requirement. For E.g. if the city is selected then there is a list of options available to set as a parameter. In the given example, the city is New York is set.
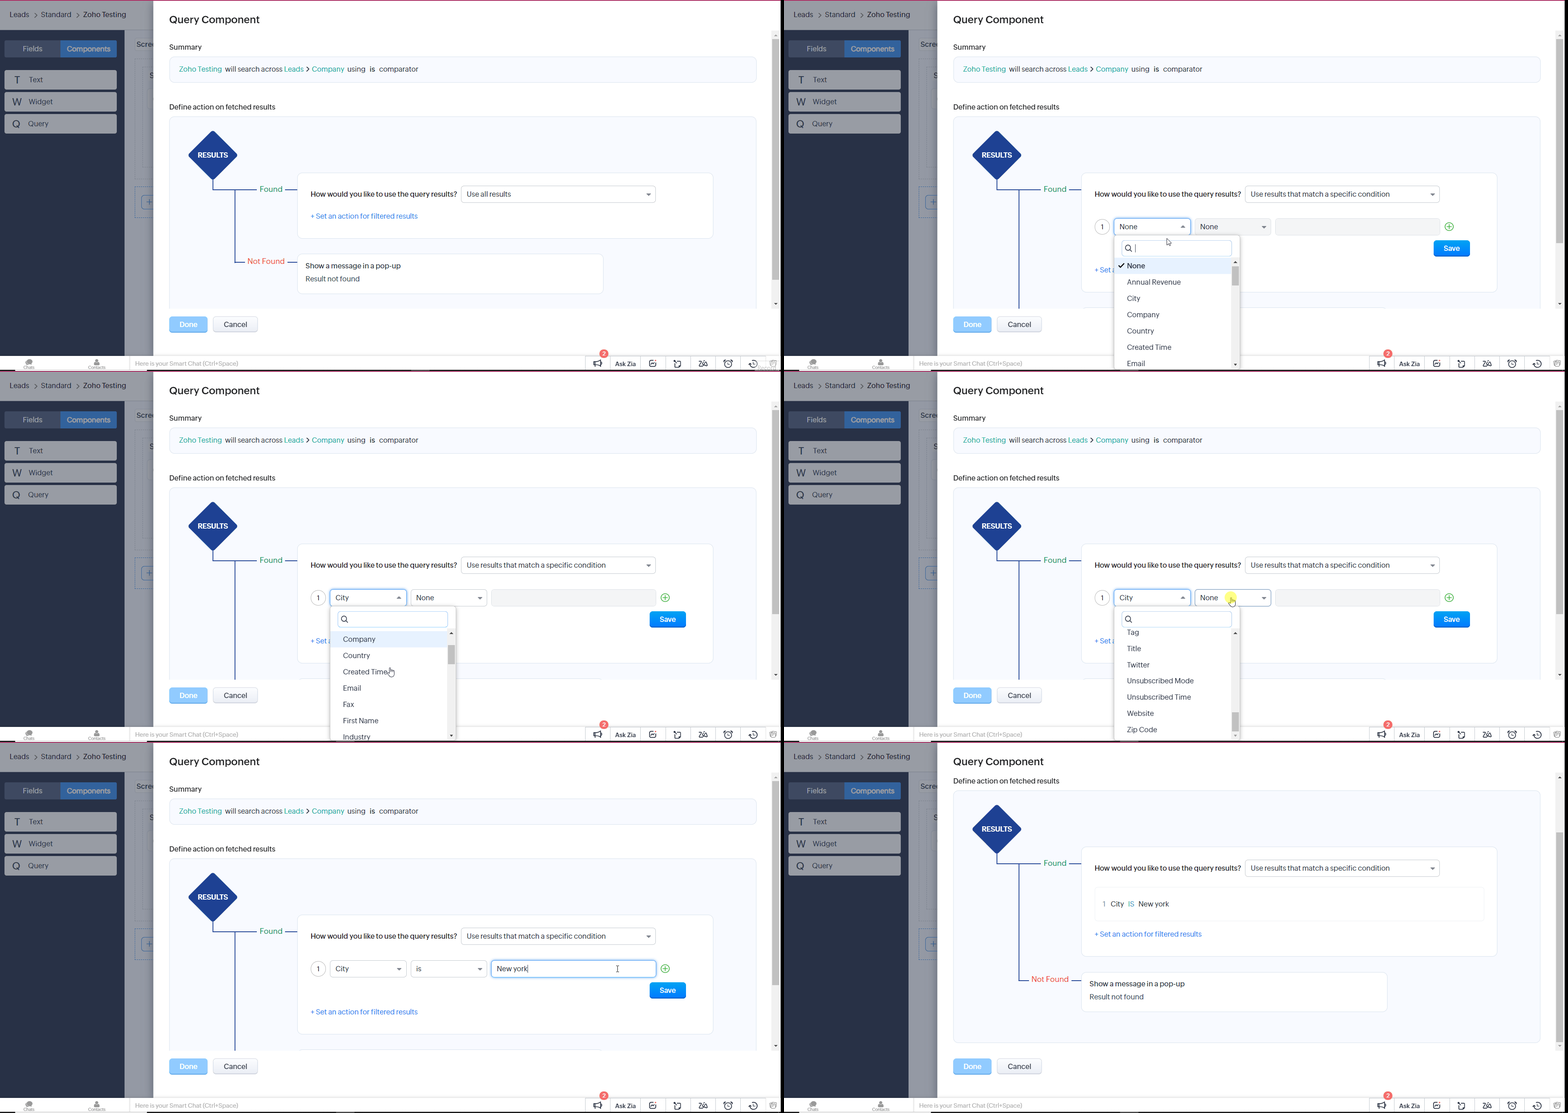
Now set an action for filtered results in the found category and enter a message to display upon matched results. You will find these options in the action drop-down
- List records and populate selected records in the lookup field
- Go to screen
- Show the widget on the current screen
- Show a message in the pop-up
- Show message in a text component
- Show inline message on a field
Click on the Done button to save. Now click on the Done button to save the Query component.
